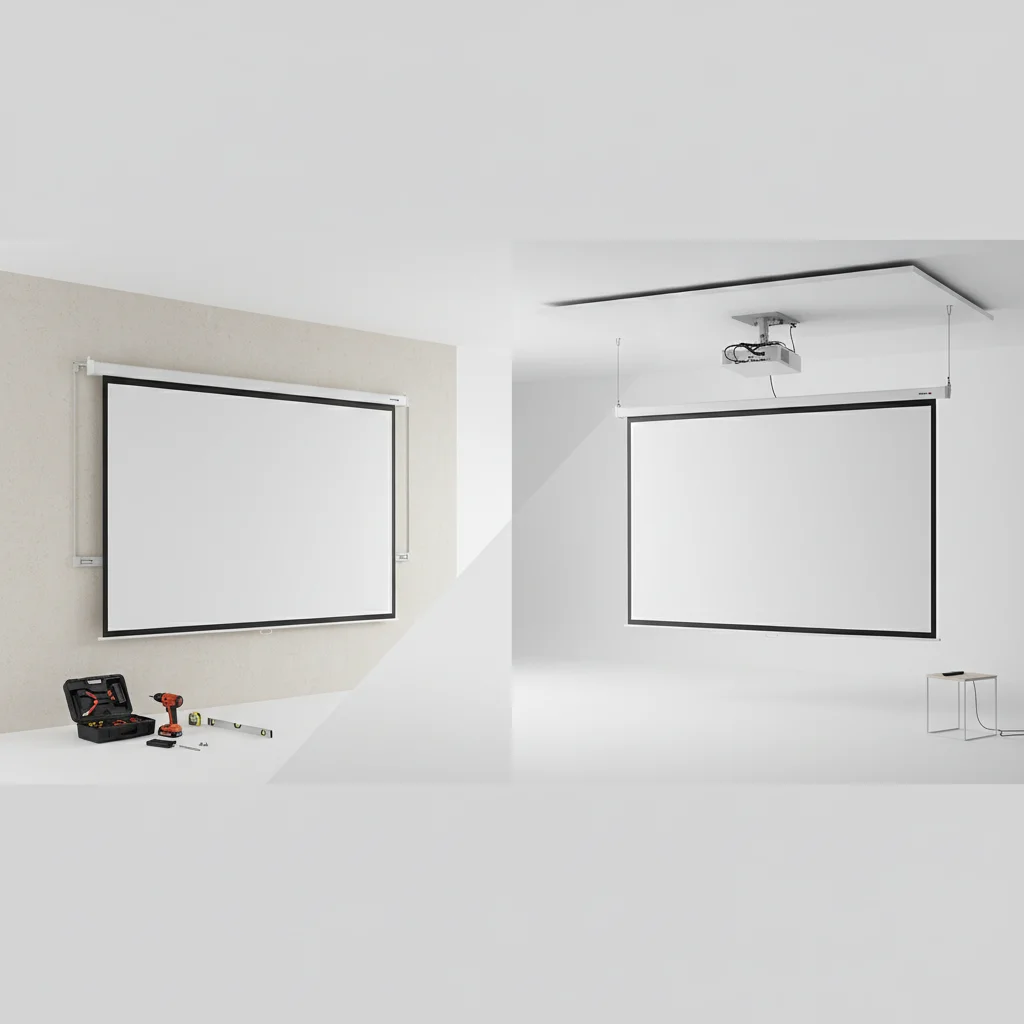
When installing a projector screen, the choice between wall and ceiling mounting depends on factors like room aesthetics, installation difficulty, and screen type. Wall mounts are generally simpler for DIY enthusiasts and ideal for fixed-frame screens, offering stability and a permanent display. Ceiling mounts, while more complex to install, provide a discreet, integrated home theater appearance, especially for retractable or motorized screens, freeing up wall space when not in use.
Understanding Wall Mount Projector Screen Installation
Wall mounting a projector screen is a straightforward process that typically involves attaching brackets directly to wall studs. This method is ideal for rooms where the screen will be a permanent fixture and where ceiling space might be limited or complex due to existing fixtures or structural elements. Wall mounts are often preferred for fixed-frame screens, providing a taut, wrinkle-free surface that mimics a large television. For browse all projector screens articles on this site.
The main benefit of wall mounting is its relative ease of installation and stability. Once secured, the screen remains in place, offering consistent viewing. However, it does occupy a significant portion of wall space, which might not be suitable for multi-purpose rooms where the wall is needed for other decor or functions. Consider the viewing angles from your primary seating area to ensure optimal placement.
Ceiling Mount Projector Screen Installation Considerations
Ceiling mount projector screen installation offers a more discreet and often more aesthetically pleasing solution, particularly for retractable or motorized screens. When not in use, the screen can retract into a housing, blending seamlessly with the ceiling and freeing up wall space. This is an excellent option for living rooms or media rooms that serve multiple purposes.
Installation for ceiling mounts can be more complex than wall mounts, often requiring more precise measurements and potentially professional assistance to ensure proper alignment and secure attachment to ceiling joists. The projector itself is also frequently ceiling-mounted to align perfectly with the screen, creating a cohesive home theater setup. Ensure there is adequate clearance for the screen to fully extend without obstruction.
Key Factors for Choosing Your Mounting Method
|
Our Picks for the Best Projector Screen in 2026
As an Amazon Associate I earn from qualifying purchases.
|
||
| Num | Product | Action |
|---|---|---|
| 1 | TOWOND Outdoor Projector Screen with stand, 120 inch Portable Movie Screen - 16:9 4K HD Foldable Anti-Crease Projection Screen with Carry Bag for Movie Nights, Camping and Parties Support Double Sided |

|
| 2 | 120inch Outdoor Projector Screen with Stand: 16:9 4K HD Portable Projector Screen Outdoor Indoor - Front/Rear Movie Screen with Carry Bag, Sandbag - Projection Screen for Backyard, Camping, Theater |
|
| 3 | Projector Screen,HUANYINGBJB 4K 16:9 HD Rear Front Projector Screen Foldable Projection Screen Double-Sided Portable Outdoor Indoor Projector Screens for Movie Home Theater (120) |
|
| 4 | TOWOND Projector Screen and Stand, 150 inch Indoor Outdoor Projection Screen, Portable 16:9 4K HD Rear Front Movie Screen with Carry Bag Wrinkle-Free Design for Home Theater Backyard Cinema |
|
| 5 | TOWOND Projector Screen with Stand, 100 inch Outdoor Projector Screen Portable Indoor Projection Screen 16:9 4K Rear Front Movie Screen with Carry Bag for Home Backyard Theater 100 inch |
|
| 6 | AAJK Projector Screen 150 inch, Washable Projector Screen 16:9 Foldable Anti-Crease Portable Projector Movies Screen for Home Theater Outdoor Indoor Support Double Sided Projection |
|
| 7 | 120 inch Projector Screen 2025 Upgraded- Black Backing, Straight Edges, Foldable, Washable and Wrinkle-Free - for Indoor Home Theater and Outdoor Cinema -White 16:9 by IOLIEO |
|
| 8 | Outdoor Projector Screen with Stand - 120 Inch Portable Projector Screen Indoor and Outdoor Projector Screens 16:9 4K HD Wrinkle Free Lightweight Movie Screen with Carry Bag,Enioy Movie Nights |
|
| 9 | Taotique Projector Screen 72 inch, Movie Projector Screen 16:9 HD Foldable and Portable Anti-Crease Indoor Outdoor Projection Double Sided Video Projector Screen for Home, Party, Office, Classroom |
|
| 10 | Pyle 50 Inch Portable Projector Screen with Tripod Stand – Lightweight, Durable, Easy Pull Setup Mobile Projection Screen with 4:3 Aspect Ratio, White Matte Fabric for Indoor/Outdoor Use |
|
Several factors should influence your decision between wall and ceiling mounting. Room size and layout are crucial; a smaller room might benefit from a retractable ceiling screen to maximize space, while a dedicated home theater could easily accommodate a fixed wall-mounted screen. The type of projector screen you choose also plays a role; fixed screens are almost exclusively wall-mounted, while manual or motorized screens offer flexibility for both.
- Room Aesthetics: Do you prefer a permanent display or a hidden screen?
- Installation Difficulty: Are you comfortable with DIY or prefer professional help?
- Screen Type: Fixed, manual pull-down, or motorized?
- Viewing Angles: Where will your audience be seated?
- Structural Support: Are your walls or ceiling capable of supporting the screen’s weight?
Tools and Tips for a Smooth Installation
Regardless of the method, proper tools are essential for a successful projector screen installation. You’ll typically need a stud finder, a level, a drill, measuring tape, and appropriate anchors or screws. Always consult the manufacturer’s instructions for your specific screen model, as requirements can vary. For ceiling mounts, consider using a laser level for perfect alignment.
When installing, always double-check your measurements before drilling. Having a second person to assist with holding the screen or marking positions can make the process significantly easier and safer. Ensure all mounting hardware is securely fastened to prevent any future issues.
Maintenance and Longevity of Your Mounted Screen
Once your projector screen is installed, proper maintenance will ensure its longevity and optimal performance. For wall-mounted screens, periodically check the mounting hardware for any loosening. For ceiling-mounted retractable screens, ensure the retraction mechanism operates smoothly and keep the screen surface clean from dust and debris. Avoid touching the screen surface directly to prevent smudges or damage.
Regular, gentle cleaning with a microfiber cloth can help maintain image quality. If your screen is motorized, occasionally inspect the power cord and remote control functionality. Addressing minor issues promptly can prevent them from becoming larger problems, ensuring your viewing experience remains top-notch for years to come.
Frequently Asked Questions
What are the main differences between wall and ceiling projector screen mounts?
Wall mounts are typically simpler to install and provide a permanent display, often preferred for fixed-frame screens. Ceiling mounts offer a more discreet, integrated look, especially for retractable screens, and free up wall space when not in use.
Is it easier to install a projector screen on the wall or the ceiling?
Wall mounting is generally easier for DIY enthusiasts, as it involves attaching brackets directly to wall studs. Ceiling mounting can be more complex, requiring precise measurements and potentially professional assistance to secure to ceiling joists.
Which mounting method is better for a multi-purpose living room?
For a multi-purpose living room, a ceiling mount is often better because retractable or motorized screens can be hidden when not in use, freeing up wall space for other decor or functions. Wall mounts occupy a significant portion of wall space permanently.
What tools are essential for a successful projector screen installation?
Essential tools for projector screen installation include a stud finder, a level, a drill, measuring tape, and appropriate anchors or screws. Always consult the manufacturer's instructions for specific screen models.
How can I ensure the longevity of my mounted projector screen?
To ensure longevity, periodically check mounting hardware for loosening on wall-mounted screens. For ceiling-mounted retractable screens, ensure smooth retraction and keep the surface clean with a microfiber cloth, avoiding direct contact.
How to Install a Projector Screen
Learn the steps to properly install your projector screen, whether you choose a wall mount or a ceiling mount, ensuring a stable and optimal viewing experience.
Decide between wall or ceiling mounting based on room aesthetics, screen type (fixed, manual, motorized), and your comfort with DIY installation. Wall mounts are simpler for fixed screens, while ceiling mounts are ideal for retractable screens in multi-purpose rooms.
Collect essential tools such as a stud finder, a level, a drill, measuring tape, and appropriate anchors or screws. Always refer to your specific projector screen's manufacturer instructions for any unique requirements or additional tools.
Carefully measure and mark the exact positions for your mounting brackets on the wall or ceiling. Use a stud finder to locate structural supports and a level to ensure perfect alignment. Double-check all measurements before drilling to prevent errors.
Drill pilot holes and securely fasten all mounting hardware to the wall studs or ceiling joists using the appropriate anchors and screws. Ensure all components are tightly secured to support the screen's weight and prevent any future issues.
With assistance from a second person, carefully lift and attach the projector screen to the installed mounting brackets. Verify that the screen is level and securely seated in its mounts. Test any retraction mechanisms if applicable to ensure smooth operation.
Get our weekly buyer guide
Practical specs, not advice. Unsubscribe anytime.

We have a retractable screen for our outdoor movie nights, and the ceiling mount was the only option that made sense for us. It frees up so much space when we’re not using it, which is great for our patio area. The setup was a bit fiddly, but once it was up, it’s been perfect for those summer evenings.
My room has some tricky ceiling fixtures, so a wall mount was the clear winner for my setup. I have a large fixed-frame screen, and attaching the brackets directly to the wall studs made it feel incredibly secure. It’s great to know it’s not going anywhere, and the picture quality is amazing.
I was really torn between a wall mount and a ceiling mount for my new home theater. After reading about the simplicity of wall mounts for fixed-frame screens, I decided to go that route. The installation was super easy, just as described, and it looks fantastic. Definitely happy with the stability and permanent display.
I opted for a ceiling mount to keep my living room looking clean when the screen isn’t in use. While it does provide that discreet, integrated look, the installation was definitely more complex than I anticipated. It took me a good chunk of the weekend to get my motorized screen perfectly aligned. Wish it had been a bit more straightforward.